DIY Mirror
Skill Level: Beginner
Here you can find a step-by-step guide and some useful tips to build this DIY mirror from scratch using a selection of our 18V POWERCONNECT™ Power Tools.
This bench is easy to make and can even be personalised with a splash of colour.
Products You Will Need
Thing’s You’ll Need
- Back Panel (can be MDF/Plywood, whichever material you would prefer cut to 120 cm x 90 cm)
- Mirror Panels (30cm x 30cm each)
- Decorating wooden mouldings/finishing trims
- Heavy-Duty Glue
- 1x Pen/Pencil
- 1x Measuring Tape
- 1x Safety Gloves/Masks/Glasses or Goggles
- Optional Paint, Sanding paper and Clamps
Step by Step Instructions
Step 1. Cut Back Panel
1. Cut your back panel (if not cut already) to 120cm by 90cm, which should fit 4 rows of 3 mirrors (30cm x 30cm). Make sure to adapt the dimensions to the accommodate the size of the mirrors you have.
2. Use the 18V POWERCONNECT™ Circular Saw or the Jigsaw to create a straight and solid cut. Make sure to wear safety glasses, gloves and a mask.
3. For additional support you can attach clamps to the panel. This way the panel won’t slip away.
Step 2. Glue Mirrors
1. Apply the glue in a zigzag-pattern for better bonding and leave to dry for a few seconds before gluing the mirror and panels to each other.
2. Press firmly to eliminate air, get a flat surface and aligned borders.


Step 3. For The Wooden Moulding/Trims And Framework
1. Start with the outside frame: cut the corner of the mouldings/trims according to the dimensions from the 4 sides: 2 x 120cm and 2 x 90cm. Leave a margin from 1-2mm for the assembly. Cut the ends so you can put them perfectly against each other.
Tip: Cut wood long and use sanding paper to sand precisely to your desired mm. This way you avoid cutting too short.
2. Glue the 4 corner mouldings/trim so they form the outside framing, ensuring the corner moulding/trim of 10mm covers the bolster plate (8mm) and the mirrors (2mm) perfectly.
3. Place mirror on a table to set, and if desired you could put clamps on the frame for better bonding.
4. To add volume and ornamental detail to the frame you can now add decorative moulding - Simply measure and mark the right length to match the length of your frame edge trims, cut to size, and glue directly onto the bolster frame. You can sand it lightly for a finishing touch.
There should be a corner moulding and a flat moulding on the 4 sides of the mirror. The frame is now finished.


Step 4. For The Inner Framework
1. Cut 2 large vertical slats (each with a length of approximately 116cm). Next, cut 9 small horizontal slats (with a length of approximately 26cm). Please make sure to check these dimensions are in line with the length of the mirror and the size of the horizontal slats.
2. Put everything in place before gluing, to be sure everything fits. If necessary, sand the pieces that are too long.
3. To have a perfect finish you must sand the moulding lightly.
4. Put some weight onto the framework and use clamps before and after the sanding to have optimal bonding.


Step 5. (Optional) Paint
1. Now that you have your finished DIY Mirror, you may choose to give it a finishing touch by painting in your desired colour.
2. Make sure to protect the mirrors with the masking tape. Apply two layers of paint. Remove the masking tape
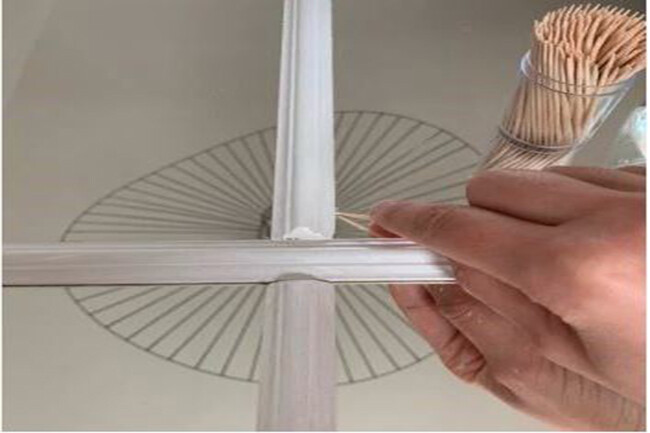
3. To clean the mirrors and remove excess paint use a wet cloth, and toothpicks can help clean up and neaten edges. You could even go one step further and give the mirror a vintage look but sanding frames in some areas. This exposes the wood a little bit and gives the white some warmth.
4. ..and volia!


